|
3/28/2019 2 Comments REPLACING POOL TILESIn order to maintain your pool appearing its best, you have to change cracked pool tiles the moment they seem. Because southern California is susceptible to small tremors and earthquakes that'll need swimming pool fix, this might be a continuing task. Thankfully, it is a matter to change pool tiles. The tough part is seeking colored ceramic tiles to complement the originals.If you can locate the swimming pool constructor that built the pool it may make it easier. Champagne Pools, a Temecula pool builder, states that the keep records of materials used on all their pool builds to make it easier to find replacement materials in the future. One Lower the water amount of the swimming pool below the broken tiles. Allow the ceramic tiles to dry.
Two Remove the grout around cracked swimming pool tiles, utilizing a grout saw. Repeat this approach for any leftover cracked pool tiles. Three Mix swimming pool thinset fix mortar based on package directions. Blend equal parts dry thinset or bonding agent. Stir the thinset very well to eliminate any lumps. Four Dampen the spot in which you're replacing broken tiles somewhat with clean water. Press the tile into place. Wiggle it forward and backward slightly to result in the mortar to spread across print on the other side on the tile. Take care to set up the replacement tile so it's despite having adjacent tiles. Repeat this approach for all of the tiles you're changing. Work the mortar into the bones with the fingers of yours. Smooth the joints along with you index finger. Five Wipe the grout with a fresh, damp sponge. Take care to not knock fresh grout outside of the bones. Allow the grout to dry out. Six Wipe any haze which stays on the ceramic tiles from dried out grout with a soft cloth. Stuff You'll need:
Tip Make an effort to capture some trash before it slips into the water. Make use of the pool 's vacuum system whenever you stop removing any particles that sinks on the bottom part of the swimming pool
2 Comments
3/23/2019 0 Comments Staining OLD Concrete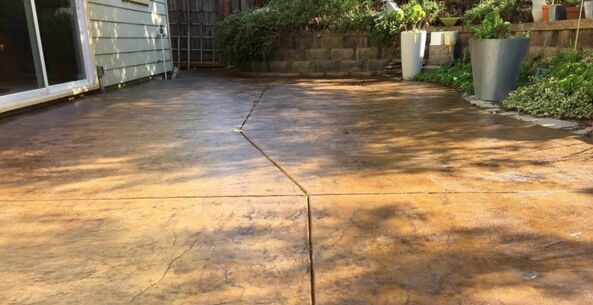 One of the most common questions regarding old concrete is "can old concrete be stained?"The solution is actually: yes, you are able to acid stain older concrete. The procedure for acid staining classic concrete isn't all that completely different from staining fresh concrete with a couple of exceptions. Below, we are going to walk you through exactly how to stain old concrete as well as the differences from how you can stain brand new concrete. Learn to Stain Concrete The Proper way - Staying away from Acrylics It is better to avoid acrylics. Nevertheless, all acrylics "stains" are actually, is actually disguised paint. With time, they are going to peel up and look bad and wind up costing you much more energy and money in the long term. Acid staining is actually a chemical reaction which completely alters the color of the concrete area. In the event that you need to stain older concrete, using a genuine acid stain is surely the most effective choice. Step one: Check the Old Concrete Before StainingThe easiest method to test to determine if your old concrete is actually sealed is actually by dumping a small h20 onto the concrete. If the bath soaks in, then you're great to begin prepping for staining. For the various other contaminants outlined above, simply check out the concrete itself. Step two: Strip The Concrete Before StainingNevertheless, various contaminants on the concrete call for methods and tools different to deal with, therefore we've outlined what you should do. If your outdated concrete has been sealed, you are going to need to get rid of the sealer before staining. When you are staining old concrete outdoors, like staining a good old concrete patio, you are able to power clean the sealer off of the advantage of the concrete. In case your concrete stain didn't respond correctly, it might be because a lot of the huge box concrete stains may not be up to the job, particularly if the concrete has at any time been acid washed or maybe acid etched. STEP THREE: DEGREASE AND CLEANWith glues and paints you'll still probably have to gently sand the concrete. Which you are able to do with a rented flooring sander or maybe floor buffing computer with the sanding pads. If you've oil or grease on the floor, you are going to need to utilize a degreaser or perhaps stain prep for concrete floors. Step four: Stain The ConcreteWhen you are staining stamped concrete, the procedure is actually the same. This's particularly the situation in case you're staining good old concrete outside. Thus, you will want to purchase a little extra to make sure you receive a great saturating coat. Based on how old, rough as well as porous the concrete is actually, the coverage of the stain may be cut down by almost as twenty % to fifty % or even more. How you can stain concrete basement floorHow to discoloration inside concrete Step five: Seal The ConcreteApplying sealer can help keep the look of the stained concrete.
We recommend using water based sealer instead of solvent based. You need to put on water foundation sealer in as tiny and also of coats as you are able to. Apply one coat operating north to south, permit it to dry out totally clear, and then use a second layer east to west. When your concrete still has a dry or patchy look, you are able to use extra coats to clean it out. After the sealer has cured for one day or perhaps 2, for concrete floors and numerous outside surfaces as well, you are prepared to use the floor wax. 3/19/2019 0 Comments Upgrading residential solar panels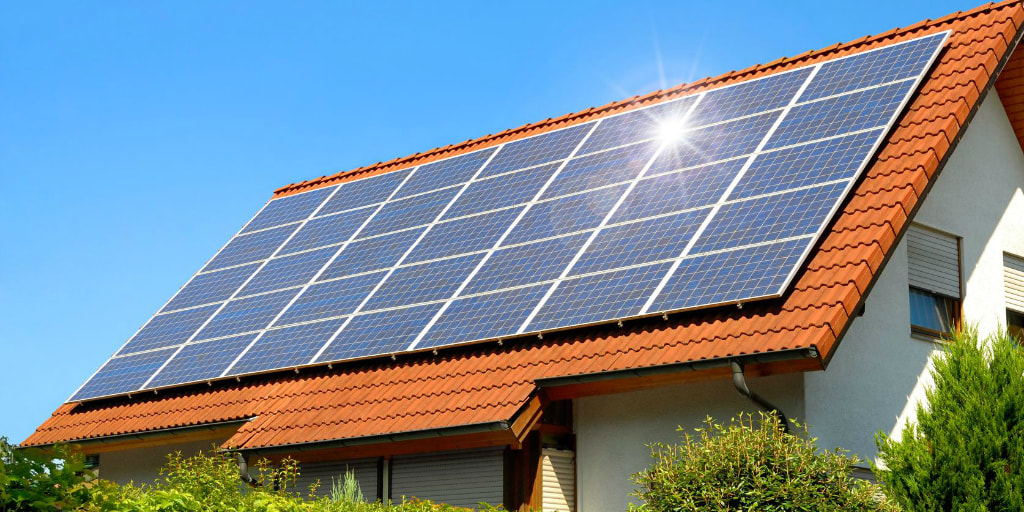 If the solar system of yours is not very meeting the electricity needs of yours, it is almost always feasible to grow the system of yours to integrate more panels. Adding panels to a current system is much more typical than you may well assume. We will talk about exactly why expanding your array is an excellent choice, and we will address the greatest methods to do it. Though you will also want to speak to your solar installer about growing the system of yours. Precisely why You need to Expand Your Solar System You will find a couple of factors homeowners might choose to grow the system of theirs after it is fitted. If any of those common factors apply to you and the home of yours, you are a great prospect for a sun upgrade. You would choose several smaller installments Typically, sense is made by it to initially use a traditional telephone system for other or financial reasons. When your sections pay themselves off, you will be in a very good economic position to invest in even more panels. You have increased the electricity use of yours. In cases that are many, you might see a growth in your electric consumption after installing the solar panels of yours. The notion of creating "free" electricity has a tendency to make sun customers a lot more relaxed about the energy use of theirs. You have enhanced the home of yours. Should you include an additional space or maybe 2 to the home of yours or perhaps refinish a basement or perhaps garage, your electric bill will probably boost also. Adding more solar panels are able to lessen the economic sting of your house expansion. Furthermore, additions frequently provide extra roof room for mounting another sun rack. Commercial entities are forced to meet renewable power quotas and are glad to buy your extra electricity through this particular marketplace. This are able to help make setting up a couple of additional panels enticing since you may promote the extra electricity for an income. The best way to Upgrade Your Solar System 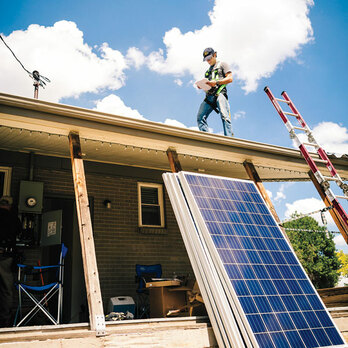 It is reasonably simple to include panels to a current system; a lot of the more challenging actions, like tying the system of yours to the grid, will by now be full. You are able to explore a few options for a system update, based on the available roof space of yours as well as the specifications of the solar system of yours. It is better to employ your original solar installer for just about any improvement to the system of yours. Changing installers for an expansion is able to void some existing warranties on the system of yours because the first installer cannot verify the job of another contractor. The best way to add panels to your roof with good exposure to the sun, it is reasonably easy to set up much more solar panels on a brand new segment of rack. This's the best situation for an improvement, and buyers that know they will be growing their system later on can arrange the original look with an eventual improvement in mind. Nevertheless, upgrades are not usually this simple. Roof space, inverter capability, and exposure to the sun could all restrict the ability of yours to grow the system of yours. With a bit of imagination, nonetheless, it is still easy to improve your system size. Precisely why You need to Match Panel OutputsWhen you are using a single inverter, you might be restricted in what panels you are able to apply to maintain your system operating smoothly and efficiently. When upgrading the solar system of yours, you are almost always more well off using sections identical to people in your current phone. If the sections in the current system of yours are not available, panels of comparable capability are the best bet of yours so the effectiveness of your array is not affected. Put simply, if the panels in your method come with an output of 250W, your extra panels must additionally get an output of 250W.
Nevertheless, there are 2 choices for growing this capacity. Typically, just setting up a second inverter and dealing with the extra sections as a distinct array is actually a straightforward and simple approach. Both inverters may be linked with the grid, therefore you normally do not have to look for extra approval for your planning board or maybe the utility company of yours. On the other hand, several solar panels manufactured today make use of a microinverter. Microinverters transform the present of a single panel, rather compared to a whole string, and they're a lot smaller and more affordable than conventional inverters. Microinverters simplify an improvement to your current program because the new sections will each change their very own current. You are able to try adding panels with microinverters a number of at a time, and also you do not have to put in more parts such as a second inverter. Each board is going to convert its own energy, therefore it will not be influenced by how big the various other sections are in the majority of the string. Furthermore, a shaded board with a microinverter will not drag down the effectiveness of the majority of the string since it's its own inverter. By using several open space in the backyard of yours, a ground mounted array is able to improve your capability without requiring extra roof space. Ground-mounted methods can be simple to install, which makes them all the more cost-effective compared to your roof mounted array in many cases. They are also simple to stay clean and repair if there is actually a problem down the highway. These methods are a lot more effective compared to conventional roof systems, providing you with the greatest value for your update dollar. Almost all solar clients are qualified for a sun upgrade. Expansions are popular enough that the system of yours might be created with an improvement in mind. In the event you have not installed a solar energy system however, you may think about adding a much larger inverter to help make upgrading down the street as easy it can be. |
AuthorWrite something about yourself. No need to be fancy, just an overview. ArchivesCategories |
 RSS Feed
